Hemagglutination Protocol & Troubleshooting
The hemagglutination test was developed in the 1940s as a method to quantify the relative concentration of viruses, bacteria or antibodies. Active lectins bind red blood cells (RBCs) by recognizing cell surface carbohydrates, forming a cross-linked network in suspension. This process is known as hemagglutination. The hemagglutination test is a well-established, simple, short and inexpensive method that is widely used for virus detection and antibody titer measurement.
Antibodies can be detected and measured by the hemagglutination method. This relies on the ability of the antibody to cross-link RBCs by interacting with antigens on the RBC surface. Creative Biolabs offers hemagglutination testing services for antibody detection. We use standard protocols to perform the assay.
For general protocols and recommendations for determining antibody activity using hemagglutination assays, please see below.
Solutions and Reagents
| Stages | Solutions and Reagents |
| Preparation | Phosphate buffer (PBS), fresh erythrocytes, trypsin, dilution buffer, incubation buffer |
| Hemagglutination | Antigen, erythrocyte suspension, incubation buffer |
Hemagglutination Procedure

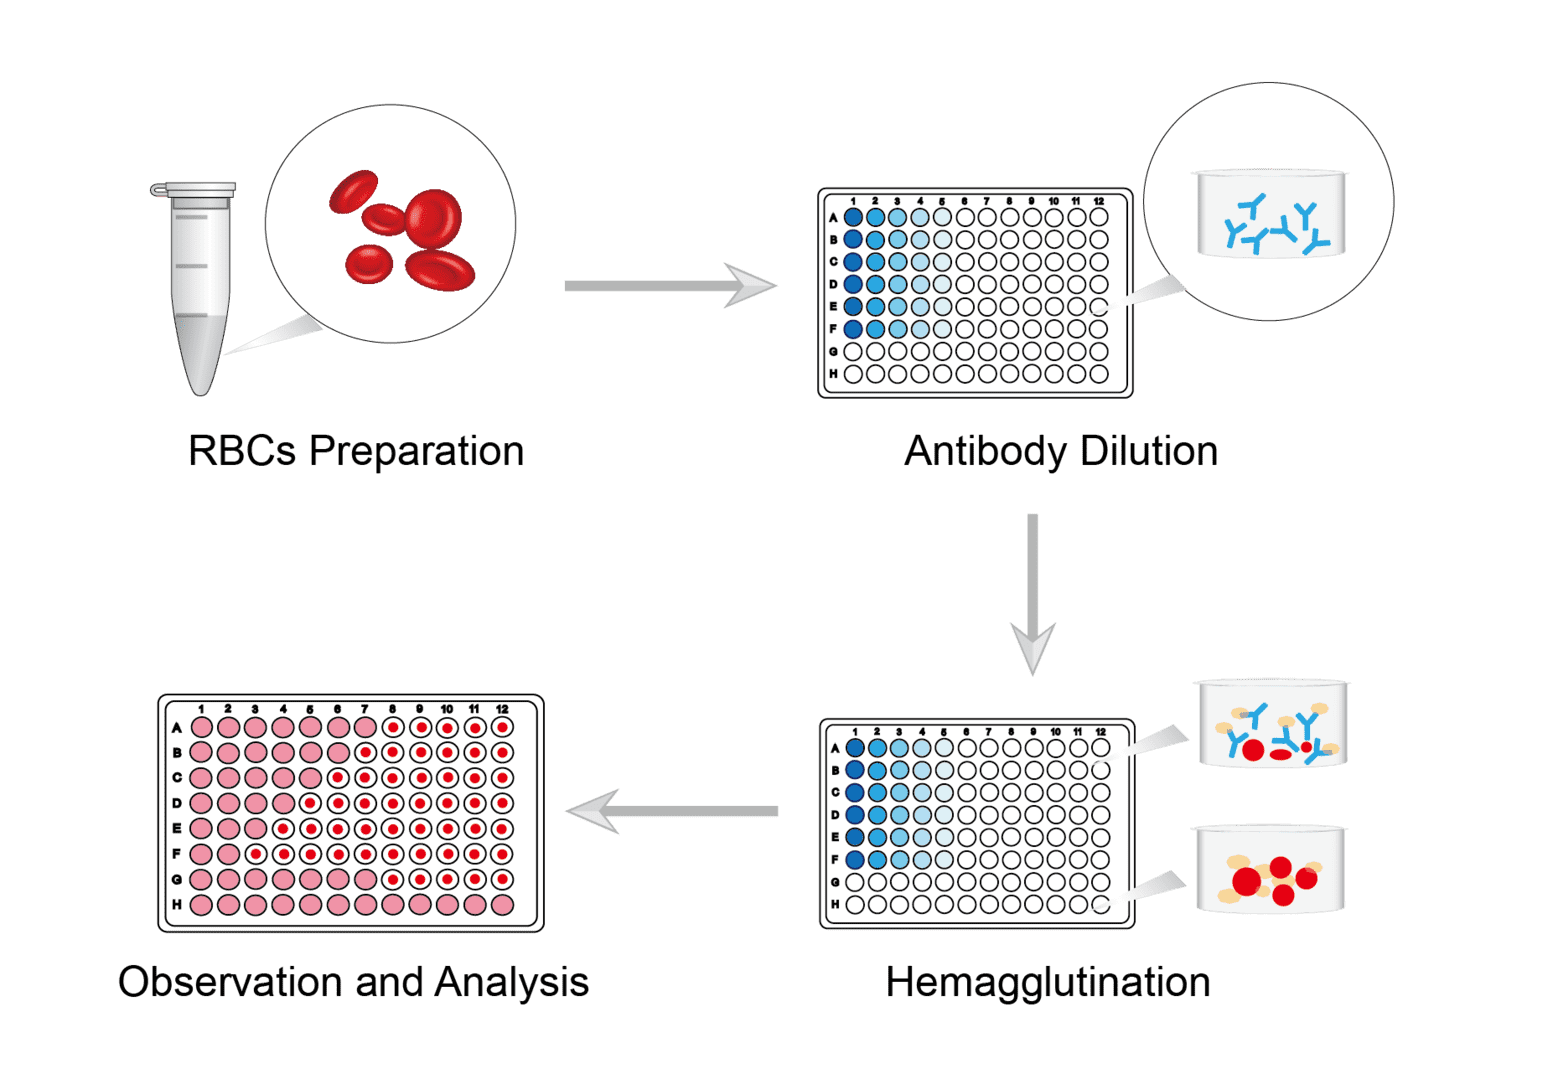
Prepare the blood of the animal you need and perform centrifugation. Remove the supernatant, gently aspirate the precipitate and resuspend. Repeat several times. The isolated red blood cells can be fixed using trypsin and sialidase. After completion, wash and resuspend for storage.
Set up antibody sample group and control group. Place equal amounts of sample and control into each well of different rows in a microtitration plate. Add equal amounts of dilution buffer to the first well, mix and perform serial dilutions. The same amount of reagent is added from one well to another, and so on.
Add a fixed amount of antigen of known titer to each well of the 96-well plate. Exclude control wells that do not require the addition of antigen. Allow the plate to react at room temperature for a time set according to specific requirements. Then add the erythrocyte suspension prepared as above to each well. Mix the plate by gently rotating it to allow adequate mixing of the reaction. Allow the hemagglutination reaction to proceed at room temperature for 30-60 minutes.
Use the naked eye or microscope to determine if agglutination is occurring. Antibody activity is expressed as a titer, defined as the reciprocal of the maximum dilution at which hemagglutination occurs.
Troubleshooting
No precipitation in pure RBC control wells
- RBC causes. It is possible that improper preparation of the RBC suspension may have caused this. Poor quality or hemolysis of the RBC suspension and failure to equilibrate to room temperature could have caused this. We recommend replacing the red blood cell suspension and storing it under strictly appropriate conditions.
- PBS causes. One possible situation is poor quality or incorrect pH of PBS. The quality of the reagents can also seriously affect the quality of red blood cells. You should carefully check that the reagents are prepared correctly and are of acceptable quality before preparation and use.
- Contamination causes. It is also possible that contamination of antigens occurred in the wells. When adding antigen, you should double check not to add the wrong wells, as well as avoid handling errors that could spill antigen into the control wells.
Positive control is negative
- No antigen causes. Positive control antigen was not added to the control wells. We suggest that you can either re-add the antigen or reset the control. Make sure that each well is set up correctly during the spiking operation. Also make sure that the pipetting instrument is accurate.
- False negative causes. The antigens in the high concentration wells are proportionally higher than the available receptors on the RBCs and therefore cannot be cross-linked into a lattice. This can happen if the dilution series is not performed far enough. The reaction is interpreted as a false negative. Usually, sufficient dilutions can avoid false negative readings due to very high virus concentrations.
Bad hemagglutination results
- RBC causes. The red blood cell concentration preparation in the experiment may not be reasonable enough. During the red cell dilution preparation, the unreasonable setting of the method and concentration may lead to lower concentrations affecting the reaction results. We suggest you to improve the reasonable measures for red blood cell preparation.
- Spiking method causes. Irregularities in spiking methods can cause some common problems in hemagglutination experiments. You should practice the spiking procedure several times and improve the standardization of the spiking method.
- Hemagglutination unit error causes. When the hemagglutination result is detected too high, the greater the antigen dilution is also. Then the potency of the antibody to be tested will be high. We recommend setting up duplicates and can base the test on the data.
These are our common questions about hemagglutination experiments and their solutions. We are committed to understanding your current relevant test problems and facilitating the process of hemagglutination experiments. We hope our information will be of practical reference to you.
For research use only. Not intended for any clinical use.
This site is protected by reCAPTCHA and the Google Privacy Policy and Terms of Service apply.

