

3D Immunohistochemistry Protocol & Troubleshooting
3D immunohistochemistry (IHC) is a technical tool for histological studies from a three-dimensional perspective. It offers greater flexibility and the ability to capture more information than traditional 2D IHC. This technique provides insight into cellular interrelationships and tissue microenvironment from images of stereoscopic results, allowing for more in-depth studies of disease.
We provide researchers with technical support for 3D IHC, describing the procedure and the key points to help our customers to use it successfully and take advantage of it in practice.
Solutions and Reagents
| Stages | Solutions and Reagents |
| Sample Preparation | Phosphate buffer (PBS), fixation buffer, embedding solution, permeabilization buffer, blocking buffer, washing buffer, antibody solution, clearing buffer |
3D Immunohistochemistry Procedure
The advantages of 3D IHC technology are obvious, but there are many challenges, including the creation of the overall protocol, tissue handling, antibody selection, and more. You can refer to the general protocol we give below for 3D IHC experiment construction.
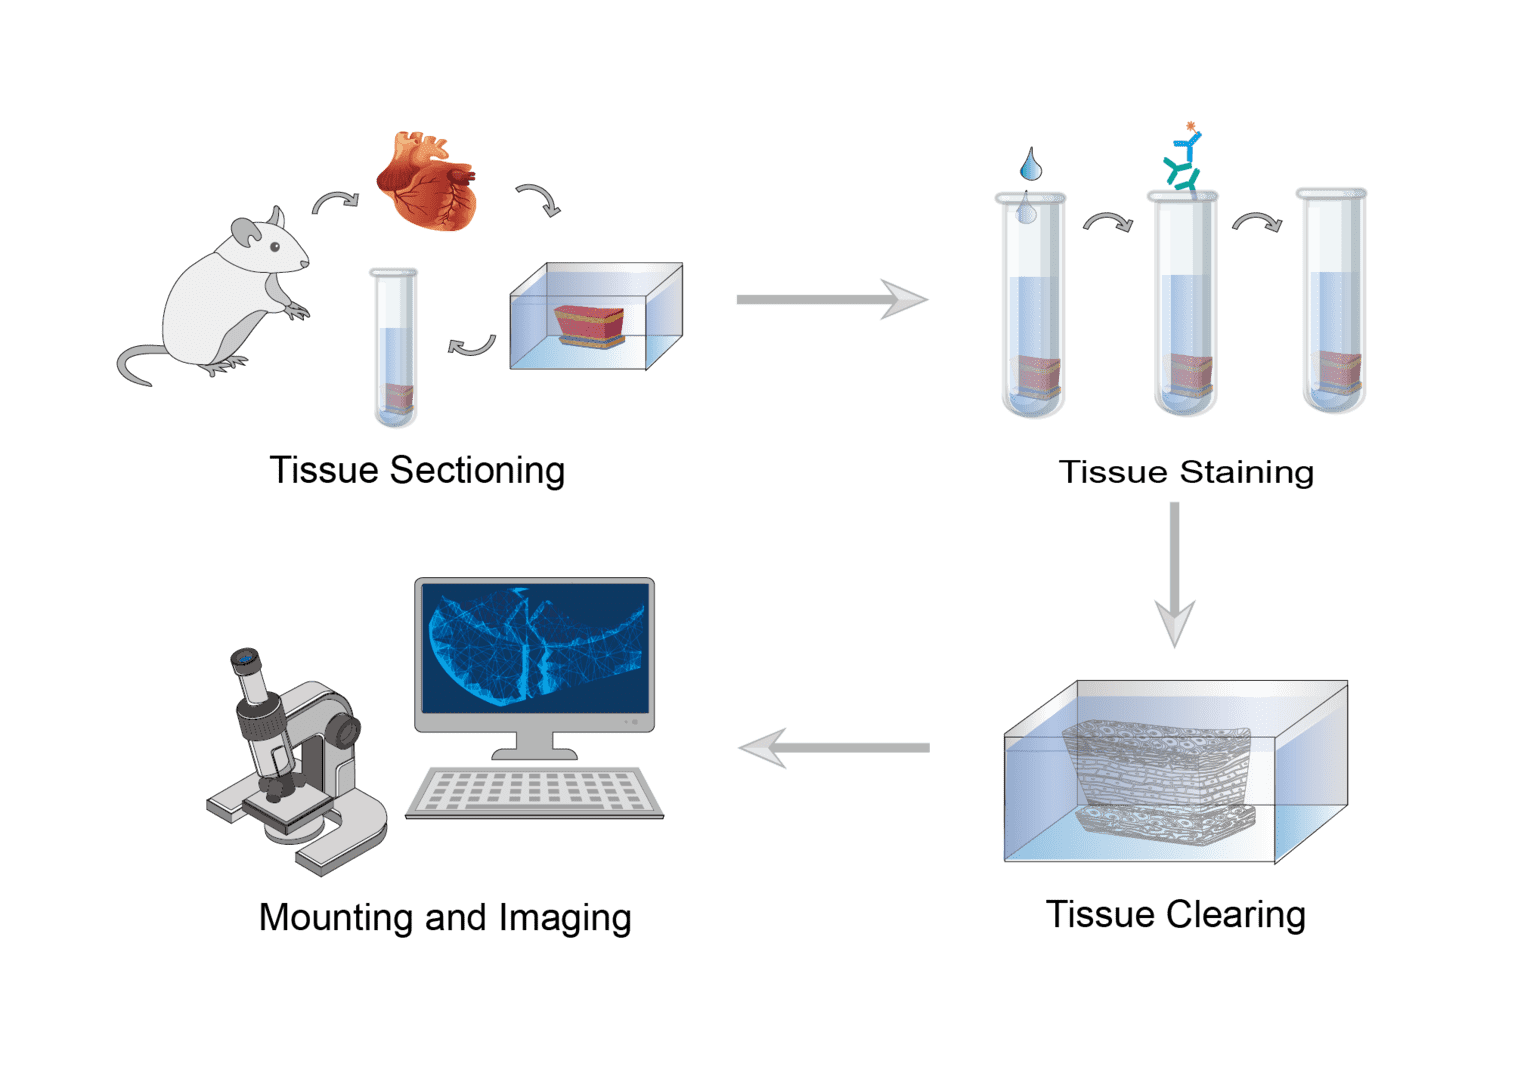
1. Tissue Sectioning
Perform pericardial perfusion washing as well as transcardial perfusion fixation on target animals. Then, harvest the organs and fix them using fixation buffer. Subsequently, wash several times and select the appropriate solution for organ encapsulation. Finally, cut tissue sections.
2. Tissue Staining
First, permeabilize and block the tissue sections. Treat tissue sections with permeabilization/blocking buffer. Then, prepare antibody dilutions of the desired concentration. Discard the permeabilization/blocking buffer and replace it with the antibody solution and continue incubation. Finally, wash the tissue sections. Discard the antibody solution and add wash buffer for several washes.
3. Tissue Clearing
After complete removal of wash buffer, perform tissue clearing. Add tissue clearing solution to the tissue sections and incubate with shaking for the appropriate time.
4. Mounting and Imaging
Prepare the sample chamber. Assemble the sample chamber by securing the spacer to the slide. Then fill the space with clearing solution. Carefully transfer and place the tissue section in the solution, covering it with a coverslip. Subsequently, seal the edges of the coverslip with nail polish and air dry. A confocal microscope can be used to observe the imaging.
Troubleshooting
Uneven or overly strong/weak staining
- Antibody concentration causes. The antibody concentration may be too low or too high. You can determine if the antibody concentration is too high or too low, and thus take action to reduce/increase the antibody concentration or reduce/increase the antibody staining incubation time.
- Inadequate fixation causes. We recommend that you use a higher concentration of fixation buffer to increase tissue fixation.
- Tissue residue causes. Fat or tissue residues can interfere with tissue staining and imaging. We recommend that you remove residual tissue prior to immunostaining.
- Insufficient permeabilization/blocking causes. Insufficient permeabilization and blocking causes staining problems. You can increase tissue permeabilization and blocking time, but you also need to be aware of the occurrence of over fixation.
High background signal
- Inadequate blocking causes. You can increase tissue permeabilization and blocking time to avoid high background from non-specific binding.
- Blood autofluorescence causes. This may be due to residual blood in the tissue created by insufficient washing. We recommend increasing the perfusion washing and tissue permeabilization/blocking time to remove blood before section preparation.
Strong fluorescent spots
- Antibody aggregation causes. You should properly centrifuge the diluted antibody solution before using it.
- Buffer contamination causes. Replace fresh buffer.
Insufficient tissue clearing
- Insufficient tissue clearing solution causes. Please increase the amount of tissue clearing solution.
- Washing buffer causes. Too much wash buffer can interfere with the refractive index of the tissue clearing solution. We recommend that you remove as much wash buffer as possible and that you can perform two tissue removals.
This protocol can be optimized for different sample requirements. For more support, please contact us.
For research use only. Not intended for any clinical use.
Send Inquiry
This site is protected by reCAPTCHA and the Google Privacy Policy and Terms of Service apply.