

Neutralization Protocol & Troubleshooting
Neutralization is a method of protein neutralization or functional blockade by antibodies. This powerful technique can be used to measure the neutralization potential of antibodies against different targets, including cytokines, viruses, toxins, and more. Here, we provide a general neutralization assay. These protocols and troubleshooting information are for informational purposes only. Your study should determine the best protocol and laboratory procedures based on the experimental objectives.
Solutions and Reagents
| Stages | Solutions and Reagents |
| Antibody Preparation | The neutralizing antibody, dilution buffer |
| Samples Setting | Virus or cytokine to be neutralized, medium, dilution buffer |
| Cell Infection | Target cells, medium |
| Detection | Reagents required for various measurement methods |
Neutralization Procedure
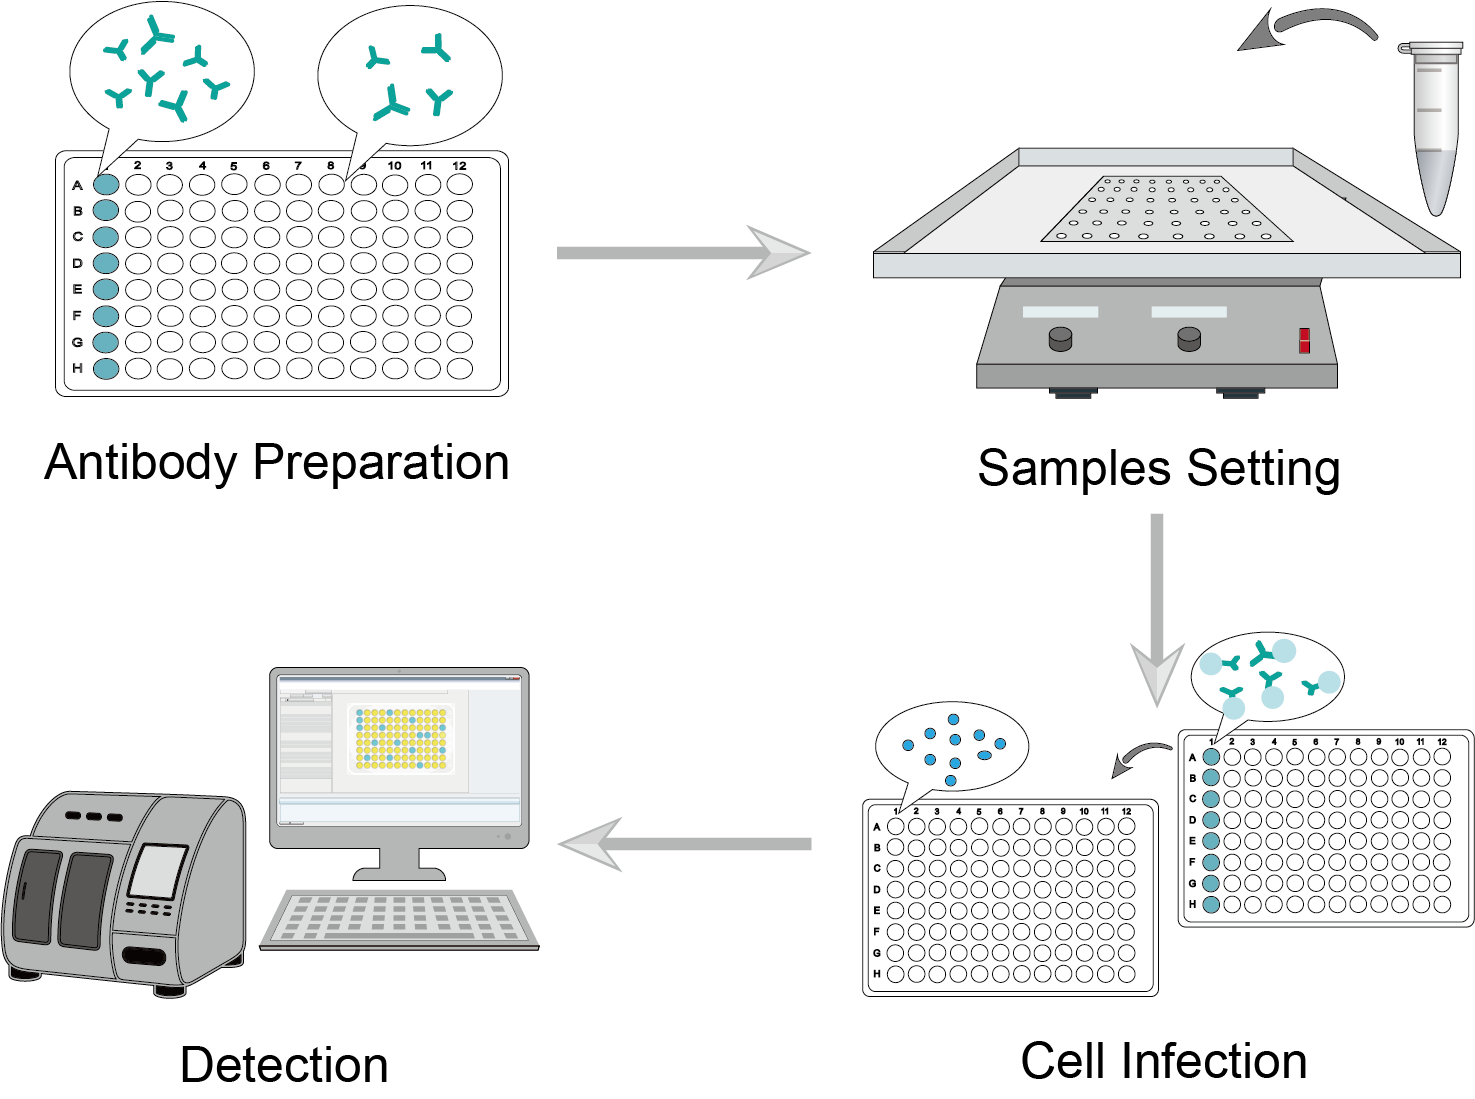 Figure 1: Neutralization Procedure.
1. Antibody Preparation
Prepare antibody dilutions in a separate 96-well plate. In the plate, serially dilute the antibody samples with dilution buffer, leaving a quantitative dilution of the antibody in each well.
2. Sample Setting
The target cytokine or virus sample is diluted to a certain concentration. The assay test is set up with positive control, negative control, and serial reaction groups. Add quantitative dilutions to the wells where the target samples need to be added. Incubate the samples and antibodies.
3. Cell Infection
Seed the cells on a new 96-well plate. Infect this plate after 8-12 hours of incubation. Transfer the co-incubated antibody-virus/cytokine to the well containing the monolayer of target cells and continue incubation.
4. Detection
Infectivity can be determined by the presence of a cytopathic effect on target cells or a decrease in proliferation. Alternatively, use other assays to measure cell viability or cell death, such as MTT, MTS, or Taipan Blue.
Troubleshooting
The general neutralization testing methods above are intended as a guideline only. We determine the best protocol for service implementation based on the client's experimental goals. And the information below explains the key steps of the protocol and possible troubleshooting. It is for your reference only.
Low-level signals
- Incubation causes. Inadequate incubation between antibodies, samples, cells, and detection reagents results in a low signal. We recommend that the incubation time for each stage can be extended appropriately.
- Infection causes. The multiplicity of infections can be increased. However, make sure that the luciferase signal is dose-dependent and not saturated.
- Detection causes. You can add some additional pretreatment steps to the cells prior to the assay to increase the readout signal.
High variability of readings in the wells of the parallel group
- Cell causes. The main source of this variability is the unequal number of cells in the different wells. You should make sure that the cells form a single-cell suspension. Wrapping the plate in aluminum foil during incubation will help to maintain a uniform temperature across the plate, resulting in more uniform growth.
- Operation causes. To prevent cell loss during the assay, please avoid aspirating the medium or washing the plate.
For improved stability, our neutralization assays are optimized to allow multiple testing against different virus strains, toxins, or cytokines. For more detailed information, please feel free to contact us about our new products and assay services.
For research use only. Not intended for any clinical use.
Send Inquiry
This site is protected by reCAPTCHA and the Google Privacy Policy and Terms of Service apply.